Navigate to the Report page
- Click on the Email link in the last column against the report you want to set up
 Enter a name for the report.
- Select the first run date(i.e the date from when you want to start receiving the automated reports)
- Select how frequently this report should be emailed. Setting up too many reports too frequently is not recommended. Think about the information being sent - is it better to get once or twice a week, or should it be sent daily?
- Select the schedule and the Period. Keep in mind, if running information needed from Daily Activity Report, the Period should be "Prior Day of Run Date."
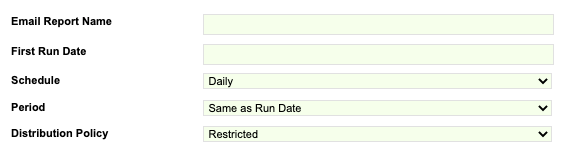
- Select the Distribution Policy. This typically is always set to Restricted, meaning that users only get reports for properties they have access to. You can setup 1 report to be emailed, but users will only see property information that they have access to. Selecting Unrestricted option will send reports to the selected users for All selected EHID's regardless of the employee E/H/NID access. Selecting Restricted option will send reports to the selected users only for the EHID's for which the user has been given access.
- Select the report run criteria
- Select Roles or users for whom you want the report to be sent. If you select per Role, this report will be emailed to everyone set to that permission. If you select per User, you know exactly who will be getting the report. If you select Role and User, users can potentially receive the report twice.
- Click on the Save & Next button in case you want to add more versions of the report.
- Click on the Save & Close button in case you wish to save and return to the report page.