*PMS Integration must be activated by Inn-Flow first. Please contact Support to activate your property for the correct PMS Integration option.*
To setup the auto emailed reports from Opera, there are three reports that will need to be setup to automatically email from Opera to Inn-Flow after Night Audit occurs. Please follow the steps below to set this up:
OPERA:
REPORT CODE REPORT NAME
trial_balance Trial Balance
stat_dmy_seg Market Code Statistics (Group by: Rate Code)
manager_report Manager – Flash (Month To Date)
We first need to check the Parameters to three reports in Opera. This allows you to setup reports with all necessary settings required.
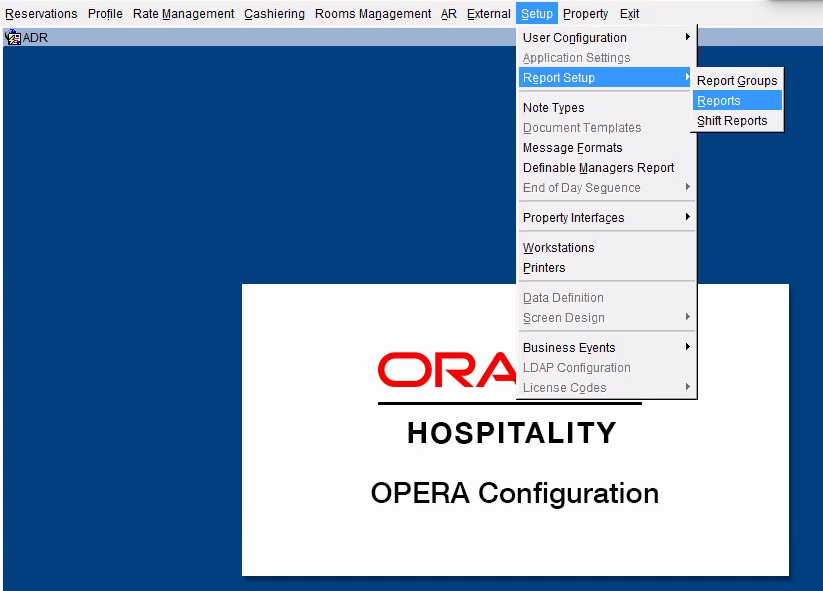
To do this, in Opera, find the Setup option in the header.
You may have to select the blue arrow on the top to scroll over.

Select Configuration on the left of the page.

Select Setup again from the top menu, then Report Setup and Reports.
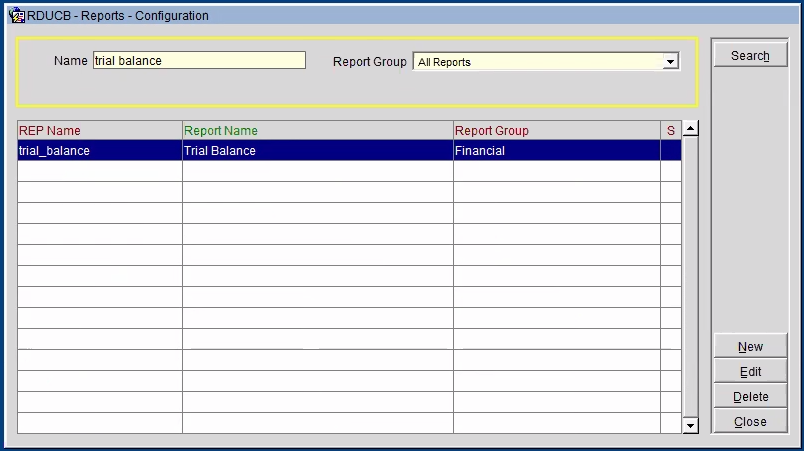
From the next page, start by searching for the Trial Balance, then select Search.

Select Edit.
A pop-up will appear with the report details. Select Parameter.

In the next pop-up, in the Date field, select the PREVIOUS DAY’s date (if today is February 18th, you would select February 17th. If today is November 20th, select November 19th).
Then select the check box next to Display Payment Details. Then Save.
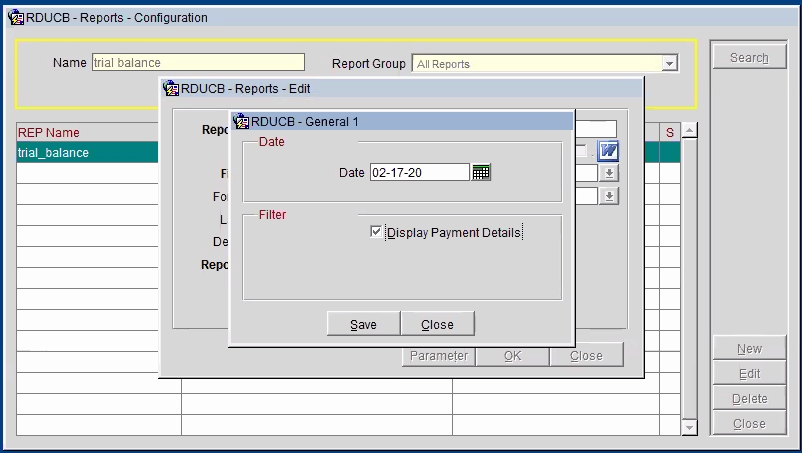
Then select OK.

Go through the same process with the Manager – Flash. Search for the report, then select Edit on the right side.

Select Parameter – Manager Flash.

Make sure that Month to Date is selected
In the Date Range field, select the Previous Day’s date and -1 in the box to the right
Select Save then OK

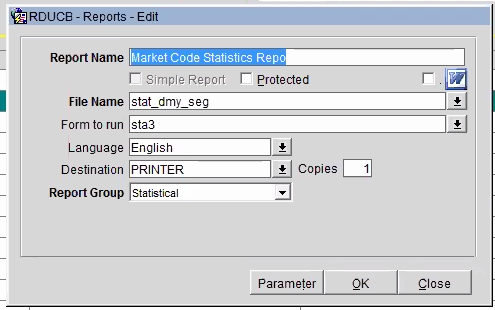
Go through the same process with the Market Code Statistics Report. Search for the report, then select Edit on the right side.

Select Parameter.

In the Date field, select the Previous Day’s Date and -1 in the next box.
In the Include box, select ONLY check boxes: Day Use & No Show.
Select Group By the Rate Code.
Select Subgroup By the Market Code.
Select Save.
Select OK.

Select OK
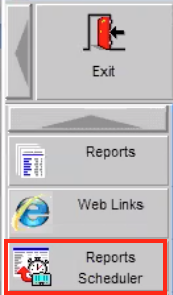
To Setup the reports to be automatically ran:
Within the Opera header, click on Miscellaneous at the top right.

Then click on Report Scheduler on the left.
On the right, select New.

Type in Manager into the Search field to find the Manager Flash report.
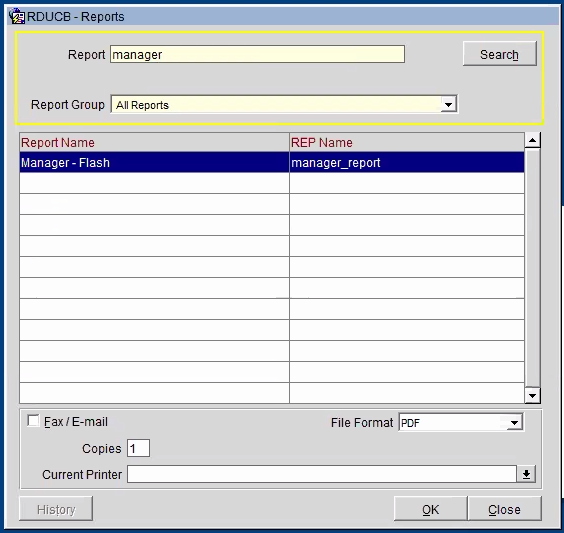
Select the Manager Flash Audit report and change the File Format to XML then OK.

Update the fields accordingly:
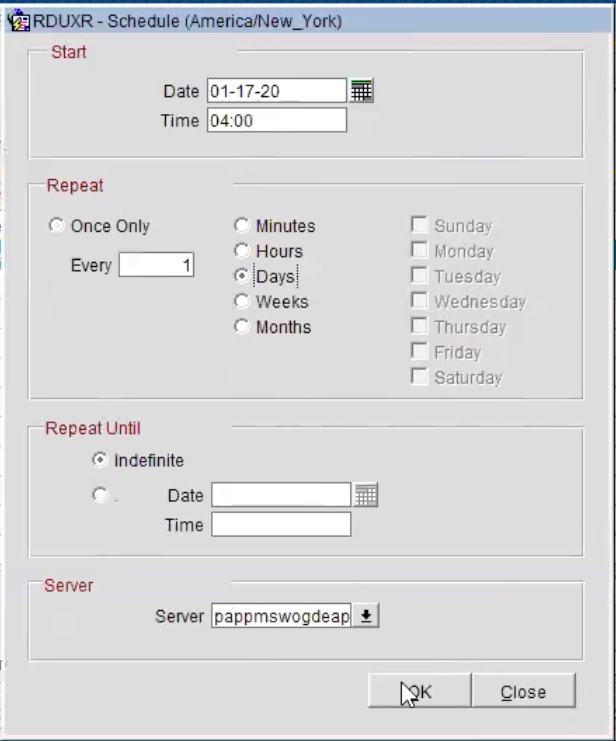
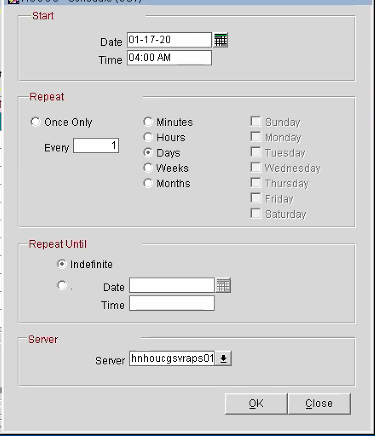
- In the Start section:
- In the Date field, update this to the Next Day’s Date. For example, if today is January 16th, I would update this to 1/17/2020. Click OK.
- Change the time to a time when you know that audit will always be ran by, like 3:00 or 4:00.
- In the Repeat section, select Days and make sure it says Every 1 on the left.
- Leave it to Repeat Until Indefinite.
- Select OK.
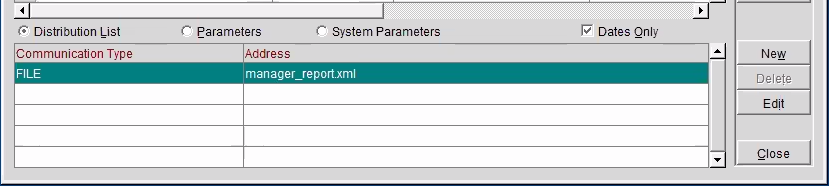
In the next pop-up, select File in order to save your report.

Follow the exact same steps, but the File Format should be in PDF. We will want to receive the XML and the PDF file nightly for reference purposes.
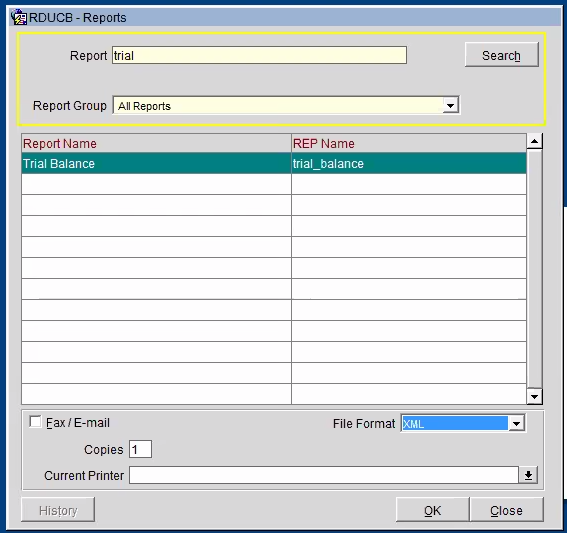
Now that the Manager Flash Report is setup correctly, we can move on to the Trial Balance report. In the Report Scheduler, search for Trial Balance.

Update the File Format to XML then select OK.
In the Start section:
- In the Date field, update this to the Next Day’s Date. For example, if today is January 16th, I would update this to 1/17/2020. Click OK.
- Change the time to a time when you know that audit will always be ran by, like 3:00 or 4:00.
- In the Repeat section, select Days and make sure it says Every 1 on the left.
- Leave it to Repeat Until Indefinite.
- Select OK.
Select File to save this report.

Follow the exact same steps, but the File Format should be in PDF. We will want to receive the XML and the PDF file nightly for reference purposes.
Now that the Manager Flash Report & Trial Balance are setup correctly, we can move on to the last report – Market Code Statistics Report. In the Report Scheduler, search for Market.
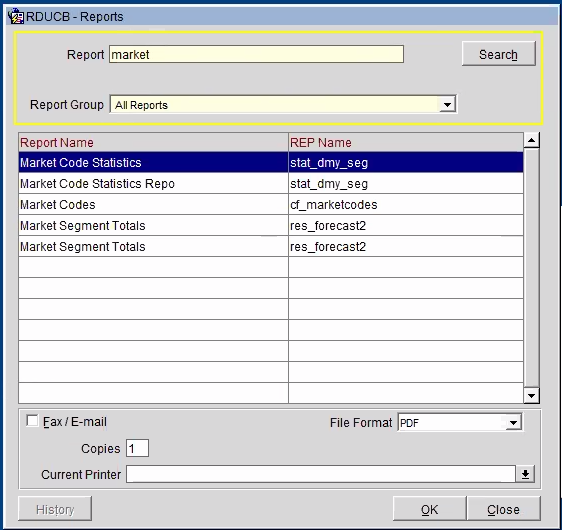
Select the correct report, update the File Format to XML then select OK.

Select tomorrow’s date change the time to either 3:00 or 4:00, whichever the Manager Flash was set to.
Set the Repeat to Days.
Ensure that Repeat Until is set to Indefinite.
Select OK.

In the next pop-up, make sure the Date is set to the Previous Day’s date, and the below settings are selected:
Previous Day’s Date
Include ONLY check boxes: Day Use & No Show (do NOT select Unused Codes)
Group by Rate Code
Subgroup by Market Code
Select File

Follow the exact same steps, but the File Format should be in PDF. We will want to receive the XML and the PDF file nightly for reference purposes.
Select Close to close the Report Setup page.
It will take you back to the original Report Scheduler page.

Now we need to add the report settings in order to:
- Add the email address the files should be sent to
- Setup the reports to be sent with the previous day’s data
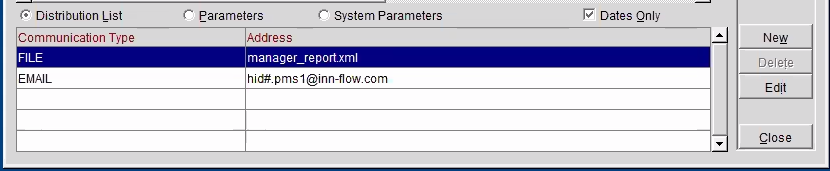
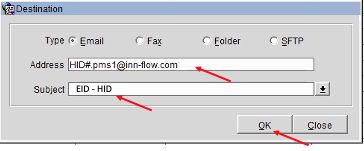
To add the email address, in the Distribution List option, we now have to add the email address you wish to send the report to. On the right, select the second New so that we can add an email address.
In the pop-up, select Email
- Type in the email address provided (HotelID.pms1@Inn-Flow.com)
- Enter the Enterprise and Hotel ID (EID – HID) into the Subject line
- Select OK
- Feel free to add additional email addresses (for the PDF & XML files) to ensure that the files are processing nightly.

The screen should appear per below.
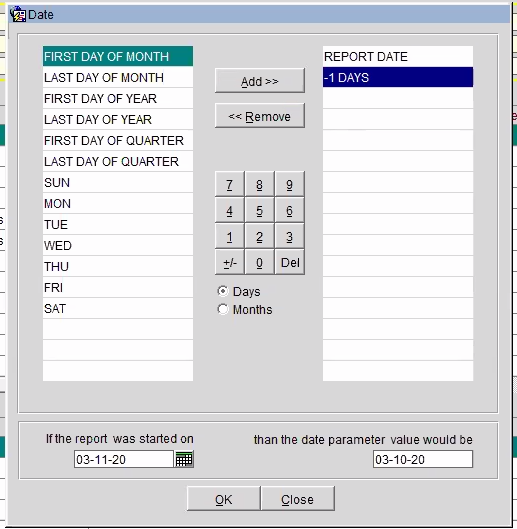
Next, in Parameters, select Set Date.

In the pop-up, select the +/- button then 1. This will make sure that when sent, it will pull the Report Date minus 1 date, which is the previous day.
Select OK.

The screen should appear as below in the Parameters section.

Now follow these same steps for all of the reports, adding the email addresses in the Distribution List and updating the Parameters to send the report for the following day.
In the Distribution List, select New on the right.

In the pop-up, select Email
- Type in the email address provided (HotelID.pms1@Inn-Flow.com)
- Enter the Enterprise and Hotel ID (EID – HID) into the Subject line
- Select OK
- Feel free to add additional email addresses (for the PDF & XML files) to ensure that the files are processing nightly.
Next, in Parameters, select Set Date.

In the pop-up, select the +/- button then 1. This will make sure that when sent, it will pull the Report Date minus 1 date, which is the previous day.
Select OK.
The screen should appear as below in the Parameters section.


Be sure to follow the above steps (setting the email distribution and the parameters for ALL reports).
The FINAL step is that Inn-Flow needs to verify that all three reports are being received, and in the correct format.
Once all instructions are followed, please let us know so that these can be verified.